Reports
Reports play a key part in Exivity. A report determines which column(s) in the normalised data created by Transcript during the Transform step should be used to group the charges.
Once a report has been created, it is necessary to prepare the day(s) that the report is required to be run against.
Once a report has been prepared for any given day (or range of days) it is not necessary to repeat the preparation process unless a rate has been updated, or the Transform step has been re-run for any days in the range of dates for which the report was previously prepared.
Creating Reports
Once data has been processed by Transcript and loaded into the system, one or more reports are created to 'slice and dice' the data however you wish. The columns specified in the report will determine the chargeable entities (referred to as a_ccounts_).
The report preparation process will update the accounts list in Exivity such that reports can be subsequently executed against those accounts.
A report is hierarchical in that the first column is termed level 1 and each subsequent column increases the level by 1. For example, a hierarchy of Reseller, Customer, Resource Group will group the charges by those columns.
Reports can be executed against any of these levels. Using the example above, a report run at level 1 will show the total charge leveraged against each unique Reseller, a report run at level 2 will show the charges associated with each unique combination of Reseller and Customer and so on.
-8b55cb49a062d33a90359b423ab83ce6.png)
Before you can create a Report, you will need to understand what data you have loaded into the system. Specifically, it is important to understand on which columns you want to report. Once you have that worked out, you can create a Report as follows:
- Go to 'Data Pipelines > Reports'
- Then click 'Add Report'
- In the new window on the right side of the screen, provide a meaningful name for your report. Keep in mind that this name will also be displayed to your customers / end users that will have access to (parts of) this Report
- Now you can select up to 5 levels deep your reporting columns. Typically these should relate to "Departments", "Business Units" etc. in Enterprise organizations. Or "Customers", "Resellers" etc. in Service Provider use cases.
- Once you've selected all columns that make up this Report, click "Insert" to create it.
Preparing a Report
Once you've created a Report, it is required to prepare it. The preparation of a report populates the accounts table and also optimizes the performance when running your reports.
To prepare your Report, follow these steps:
- Go to 'Data Pipelines > Reports'
- Then click the Report name that you want to prepare
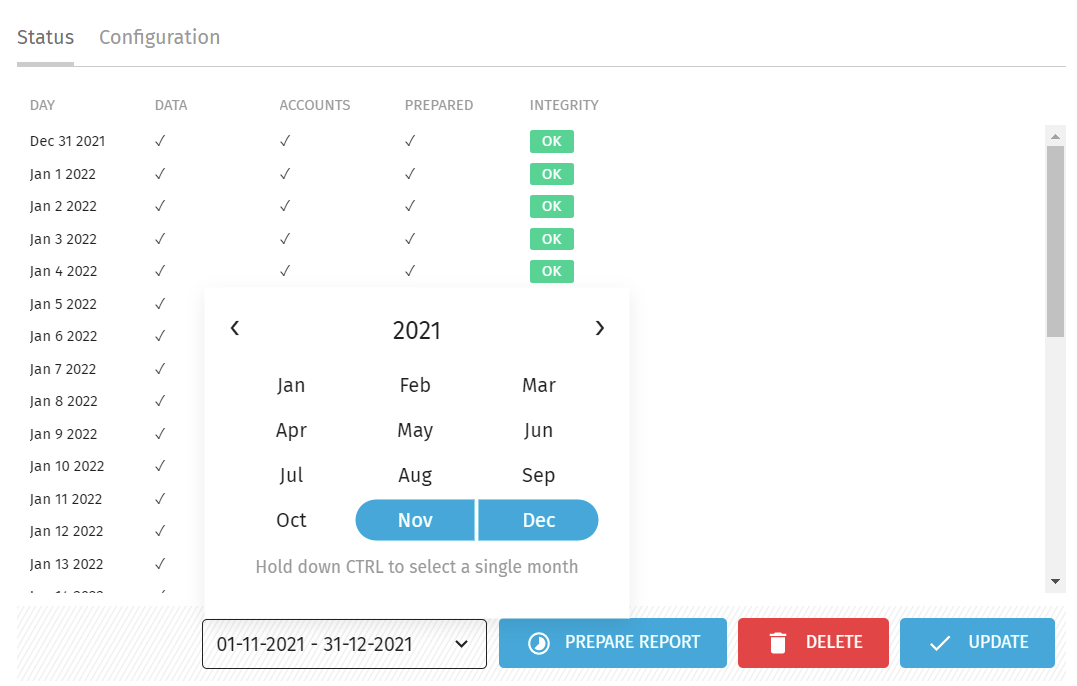
- The list on the left shows the number of Days that have consumption Data available. When the Integrity for a single day is shown as Unknown, it means that particular day(s) requires preparation. When creating a new Report, this needs to be initiated manually for the entire date range as shown in the above example.
- Click the 'Prepare Report' button
It might take a few seconds up to several minutes before the preparation of your Report has been completed. This depends on the amount of Consolidated Usage Records, and the amount days you'll have to prepare your report for. While the preparation of your report is running in the background, you may continue to use the system. However, until the preparation of the report has been completed, the report might not be showing any data. Only after preparation has been completed, the resulting data will be available for reporting via the Reports menu on the left side of the screen:
-7762b49ddc875c730489e166c82a19b4.png)
It will be required to select first the appropriate report name from the drop-down report selector.