Claims-based identity provisioning: users, Account access and user groups
Claims-based Account access and User Group provisioning in Exivity
In the case of large organizations with a large number of users that log in through SSO, giving Account access to each one of them or assigning them to a group, quickly becomes an intensive manual labour. To avoid this, Exivity implemented a mechanism that automatically assigns appropriate permissions to SAML2 users. For example, users will have Metadata applied (such as Security Groups memberships), which could be leveraged to automatically give each user access to the appropriate Account(s) in Exivity. Apart from Account level Access, the Exivity Group membership can also be provisioned automatically, without the need for any manual intervention from an Administrator.
Claims-based identity & SAML2
A claim is a statement that one subject, such as a user or organization, makes about itself. For example, the statement can be about a name, group, privilege, association or capability. Claims are held in an authentication token which is then used to authenticate against multiple applications. Apart from enhanced security, a claims-based identity has the potential to simplify authentication logic for large amounts of users that require account provisioning and configuration across multiple applications.
SAML works by exchanging user information, such as identifiers, and other relevant attributes between the Identity Provider (IdP) and Service Provider(SP). As a result, it optimizes and secures the authentication process as the user only needs to log in once with a single set of authentication credentials. When the user tries to access a website (SP), the IdP passes the SAML authentication to the SP, who then grants the user entry and access to its resources. The diagram below exemplifies the SAML2 flow between Exivity and the IdP:
-165af6a05fbf21e936f4ad22c51efd8a.png)
Tutorial: configure claims-based identity and Account access provisioning
This feature is currently in Beta, so make sure to enable Beta features in order to configure claims-based access provisioning.
For demonstration purposes, this tutorial uses OneLogin as an Identity Provider.
This tutorial is divided into three main sections:
1) The configuration of a OneLogin account to integrate SSO with Exivity.
2) The configuration of your Exivity instance, so that it can be used as a Service Provider.
If you already have an SSO configuration enabled and configured, you may be interested only in the 3rd part of this tutorial, therefore skip sections 1 and 2.
Part 1: Configure OneLogin
- In order to use OneLogin as an Identity Provider, you need to set up a new application. To do so, navigate to the OneLogin administration, hover over Applications in the navigation bar, and click on Applications:

- Click on the Add App button in the top right corner:

- In the list of applications, search for "saml" and click on the item SAML Custom Connector (Advanced):

-
Provide a meaningful name for your app, then click Save.
-
Click the Configuration tab. You will notice there are some fields to configure:
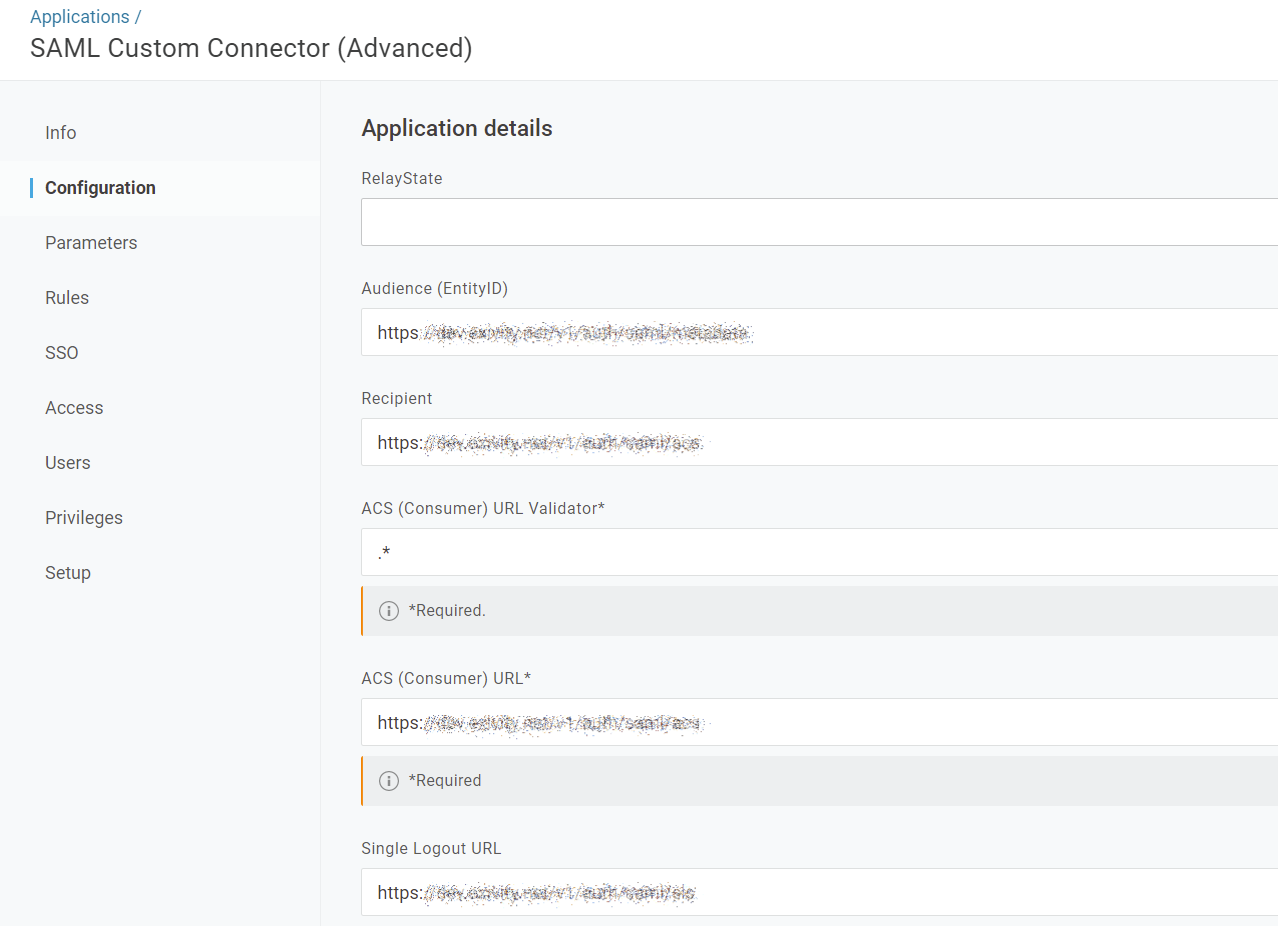
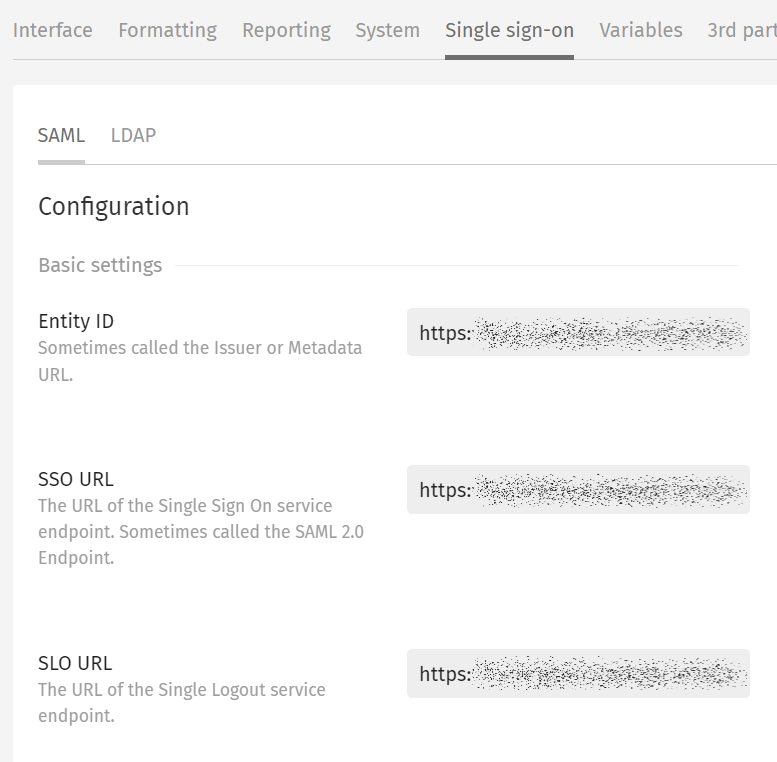
The required information to fill in these fields can be found at the Administration > Settings > Single Sign-on > Endpoints section in the Exivity GUI:
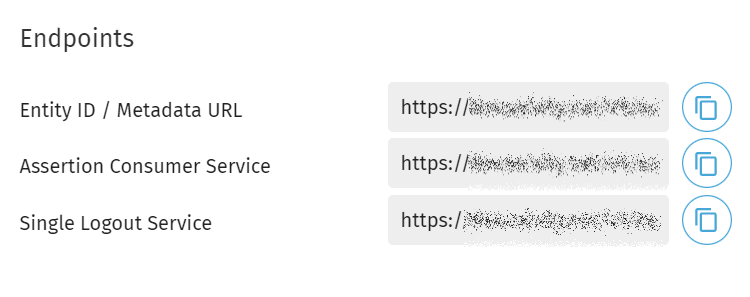
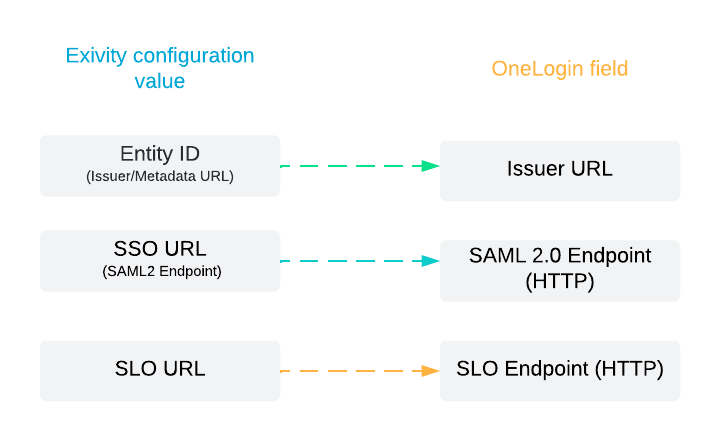
Follow this mapping between OneLogin and the Endpoints:

- After filling in the fields, click the Save button in the top right corner.
Part 2: Configure your Exivity instance
- Now, you have to copy and paste some values from the OneLogin application into the Exivity instance Single Sign-on settings. In OneLogin, click on the SSO tab:
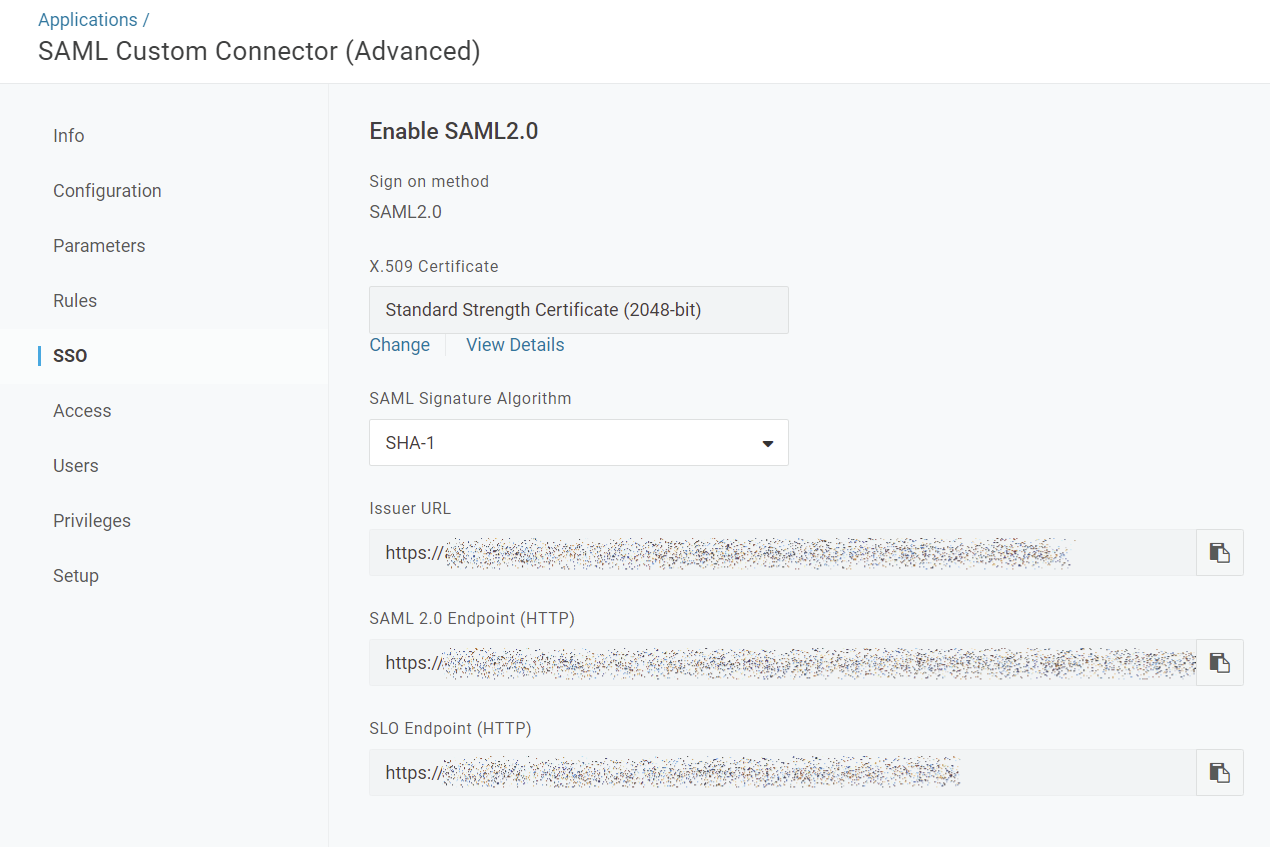
- In a separate browser tab, open the Exivity GUI. Navigate to the Administration > Settings > Single sign-on menu and select the SAML tab. Copy over the following settings from OneLogin with this correspondence:
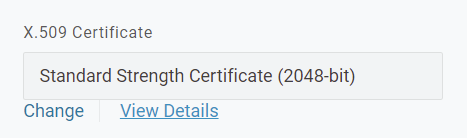
- Now, let's set up the OneLogin certificate in Exivity. In the same SSO tab in OneLogin, under the label X.509 Certificate, click the View Details link.
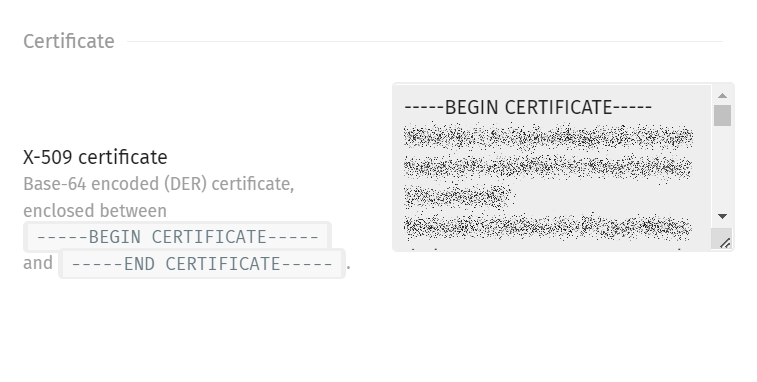
- Copy the X.509 Certificate and paste it in the X-509 certificate field in the Exivity SAML settings:
-
Click Update to apply your new settings.
-
You also need to add the OneLogin domain for your organization to the CORS whitelist as well. Navigate to the System tab in the Administration > Settings menu and add your domain in the CORS origins field.
Your domain may look similar to: https://name.onelogin.com

Make sure to separate the CORS origins domains with a comma.
- Click Update to apply your new settings.
Part 3: Configure the SAML2 attributes for claims-based identity provisioning and Account access
- Navigate to the Administration > Settings > Single sign-on menu and select the SAML tab.
- Scroll down to the User Provisioning, User group and Account Provisioning sections. You will notice that for each section you can fill in some attributes.
If you don't see the aforementioned sections, it might be that you haven't enabled Beta Features.
In order to understand the attributes in a SAML2 response and the configuration that we have to do, it's important to understand the following workflow, which describes the communication between a Service Provider and an Identity Provider:
- The user opens their browser and navigates to the Service Provider's web application (In this case, Exivity), which uses an Identity Provider (In this case, OneLogin) for authentication.
- The web application responds with a SAML request.
- The browser passes SAML request to the IdP.
- The IdP parses the SAML request.
- The IdP authenticates the user by prompting for a username and password or some other authentication factor. NOTE: The IdP will skip this step if the user is already authenticated.
- The IdP generates the SAML response and returns it to the user's browser.
- The browser sends the generated SAML response to the Service Provider's web application which verifies it.
- If the verification succeeds, the web application grants the user access.
Assume there is a user called Foo who is a member of the AD (Active Directory) group: group2. After step 7 in the above example, the SAML2 response in an XML format may look like this:
<saml:AttributeStatement>
		<saml:Attribute NameFormat="urn:oasis:names:tc:SAML:2.0:attrname-format:basic" Name="Email">
				<saml:AttributeValue
		 				xmlns:xsi="http://www.w3.org/2001/XMLSchema-instance" xsi:type="xs:string">[email protected]
				</saml:AttributeValue>
		</saml:Attribute>
		<saml:Attribute NameFormat="urn:oasis:names:tc:SAML:2.0:attrname-format:basic" Name="Department">
				<saml:AttributeValue
		 				xmlns:xsi="http://www.w3.org/2001/XMLSchema-instance" xsi:type="xs:string">group2
				</saml:AttributeValue>
		</saml:Attribute>
</saml:AttributeStatement>
In the SAML2 response, we can observe that there are Attribute Names and Attributes Values.
We are interested in the attribute name that holds the group2 value. In this case, the attribute name is Department.
- In order to provision Account access based on claims (for example, the user Foo is part of a group), you must create a Metadata definition and associate it with the Account(s) that you want to be accessible for the user(s) which are part of that group.
Consult the Metadata article for a detailed guide about how to create a metadata definition and link it to an account.
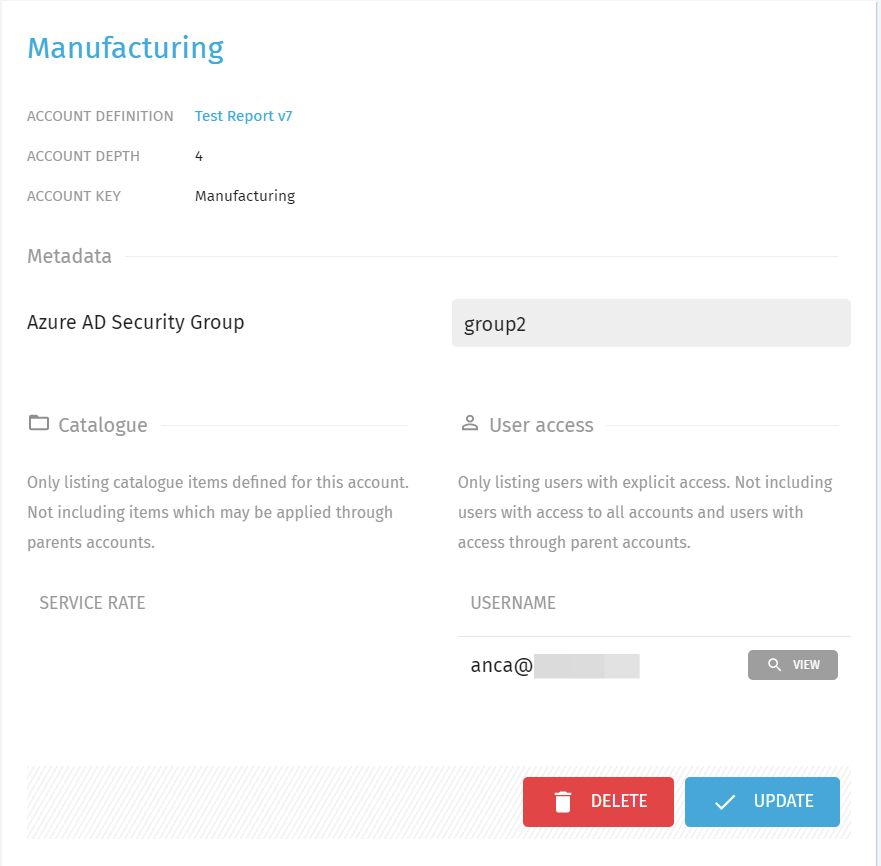
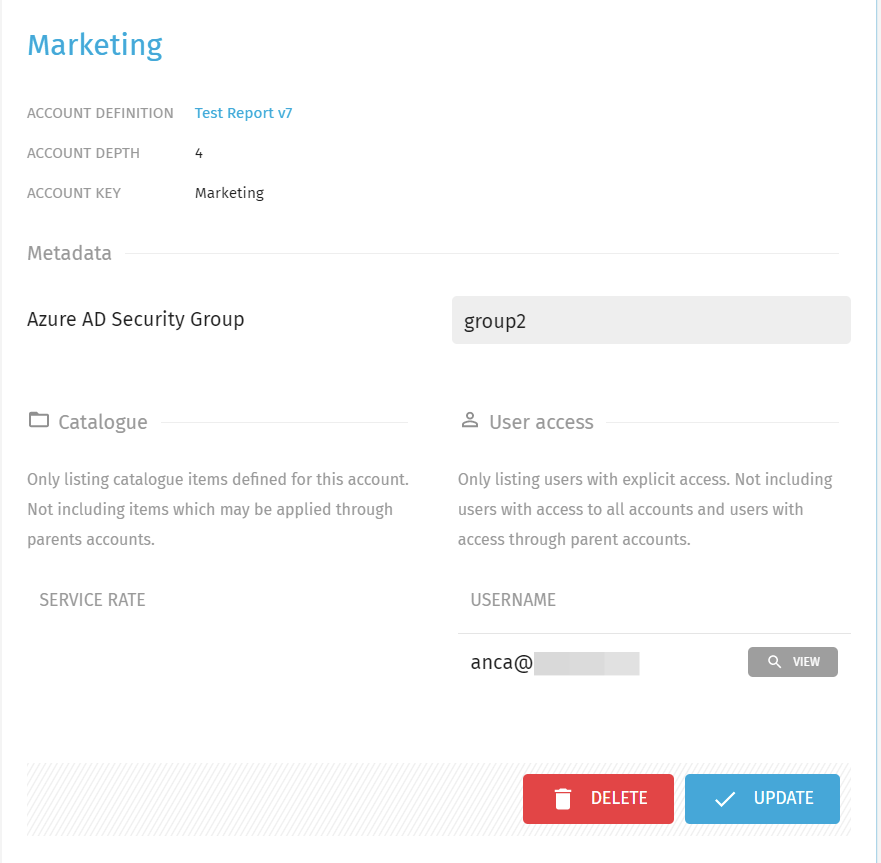
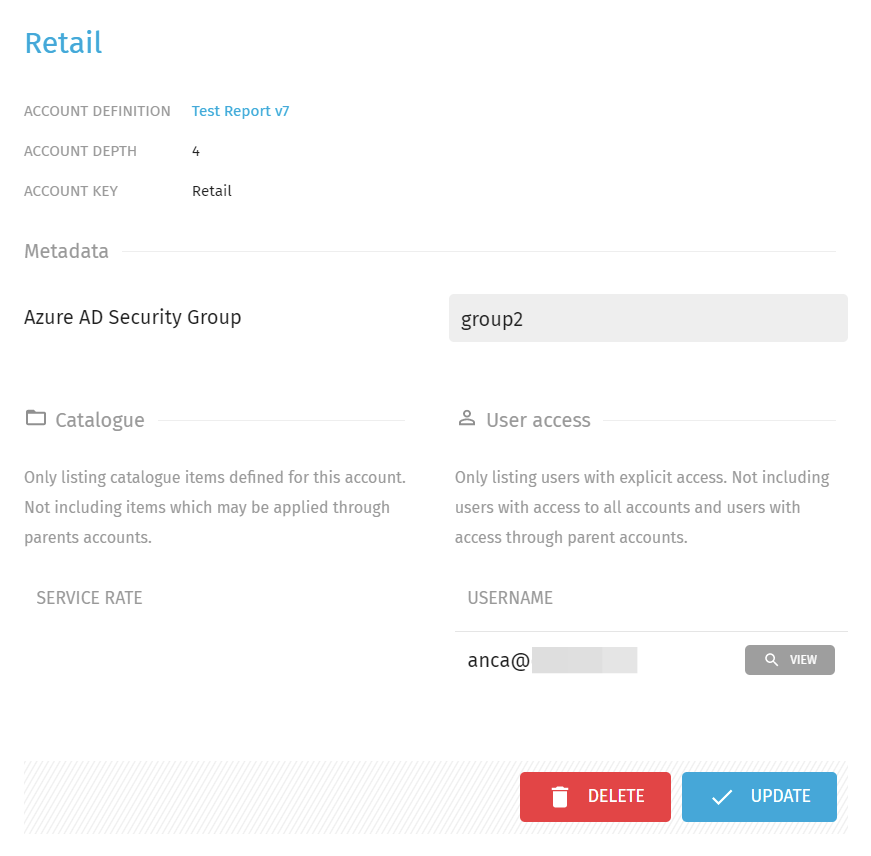
- In this tutorial, we configured a custom Exivity Metadata Field "Azure AD Security Group" and set this value for the Accounts "Manufacturing", "Marketing" and "Retail" to group2.
| Manufacturing | Marketing | Retail |
|---|---|---|
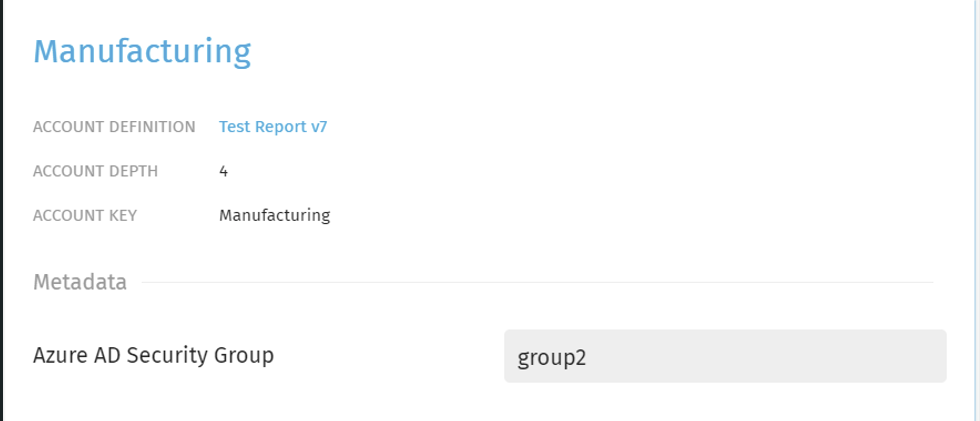 | 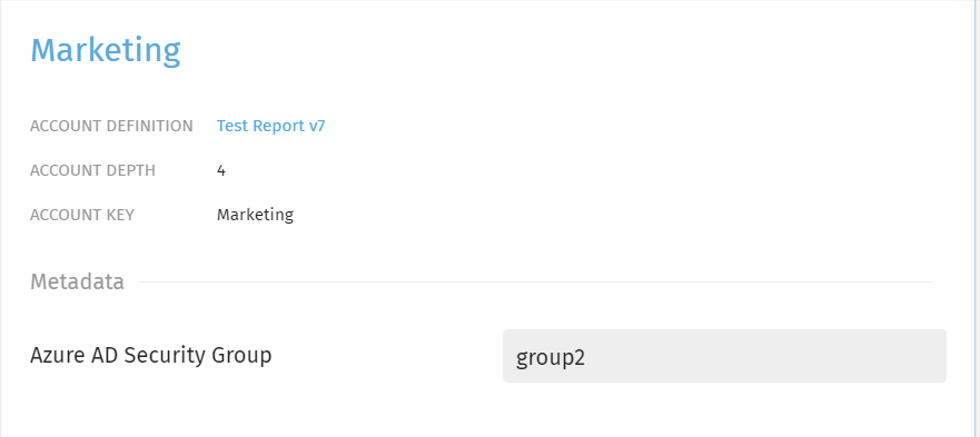 |  |
- In your OneLogin configuration screen, navigate to the Parameters tab and click the + button to add Attributes. In this case, we added an Attribute named "Department":

To test our claims-based Account provisioning scenario, we must assign a value to the Department attribute. To do that, open the User tab, click on your user and add your prefered value to Department. In this case, we want a user who is part of the group2, in accordance with the Metadata value we configured earlier:

- In the Account provisioning section mentioned earlier, this definition must be mapped by filling in the fields:
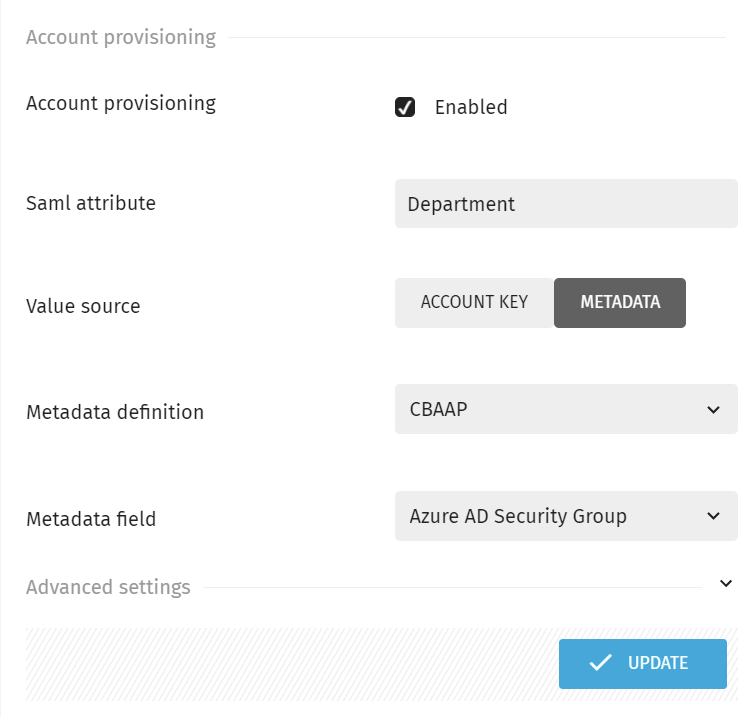
In the picture above, the SAML attribute "Department" is checked against the metadata field "Azure AD Security Group". If the values of these two keys match, then the user will receive Account access to that/those Account(s) that are connected to this Metadata definition.
The following diagram illustrates how the mapping between user attributes and metadata fields works when doing claims-based Account access provisioning:
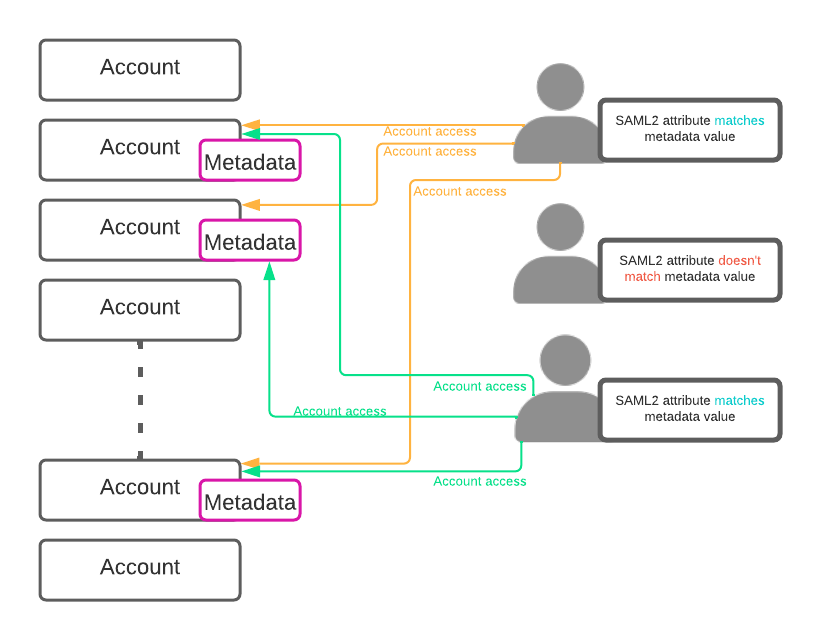
If the user's claims (i.e. the attributes in the SAML2 response) don't match any of the Metadata values assigned to one or more Accounts, then the user will not receive access and visibility to those Accounts, unless an Administrator configures it manually.
Account key vs Metadata
If you select Account Key instead of Metadata, then the attribute value will be matched against every Account with that name. For example, if we would have selected Account key with the same Department attribute (whose value we know is equal to group2), then the user/s would get access to all the Accounts that are named group2.
- Now that you know how the mapping of SAML2 attributes works, fill in the details for the User Provisioning and User Groups settings with the corresponding SAML2 attributes:
Note: These attributes here are specific to OneLogin. For other Identity Providers, they might differ.
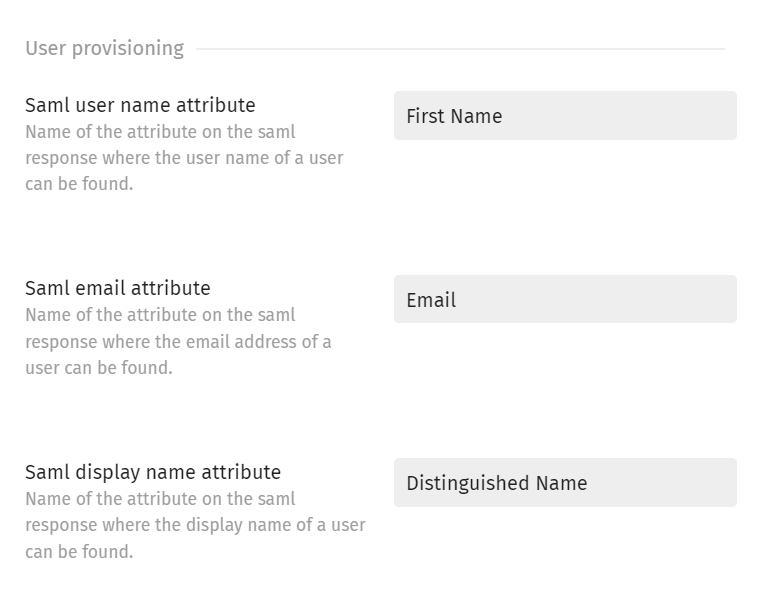
The User Provisioning attributes have the purpose of assigning a relevant name, email and display name when an SSO user logs in for the first time.
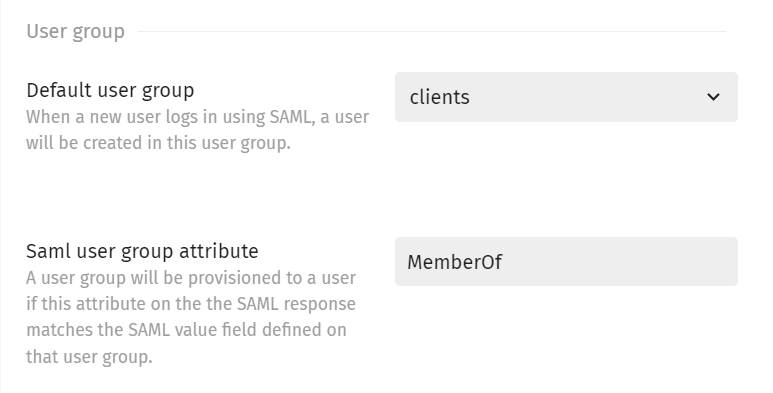
The User group attributes have the purpose of assigning the user to the right group, if it has been sent through a SAML2 attribute. For example, in the picture above, if MemberOf = managers, then the user would be assigned to the Managers group. Otherwise, it will be assigned to the Default chosen group.
NOTE: In the event where a user returns multiple values for the SAML attribute which is used for mapping, then the first value that is matched will be considered. This means that, if a user is a member of 2 different AD Security Groups, and both groups are also used for Exivity Account Level access mapping using a Metadata field, the first match is leading. The second (potential) mapping match will therefore be ignored.
-
Click Update to apply your changes.
-
Finally, we can test our automatic Account access provisioning. Enable Single Sign-On in Exivity by navigating to Administration > Settings __ and then clicking on the System tab. Make sure the Single Sign-On option is set to an option including SAML2 Authentication:

-
Click Update to apply your change.
-
Log out of the current session and you will be redirected to the login page which may look like this:

-
And by clicking on the Login button, you'll be taken to the OneLogin login screen.
-
After logging in, we can observe that the user only has access to the Accounts "Manufacturing", "Marketing" and "Retail", as expected_:_
Depending on which Metadata fields you configured (for example a Security Group), you will observe that your user(s) whose claims/attributes match with the metadata fields, automatically received access to one or more Accounts, eliminating the need for manual configuration.