Workflow notifications
Users can get notified (on a notification channel) whenever a workflow has finished its execution. This way you can inform customers, departments, or project owners when their configured workflow has finished successfully or with a failed status.
These are the steps to configure a Workflow notification:
This tutorial teaches you how to create notifications for yourself, but you can also create them for other users if you have admin rights.
-
Create a Workflow or choose an existing one.
-
Click on your username at the top right corner of the screen, then select My Notifications.
-
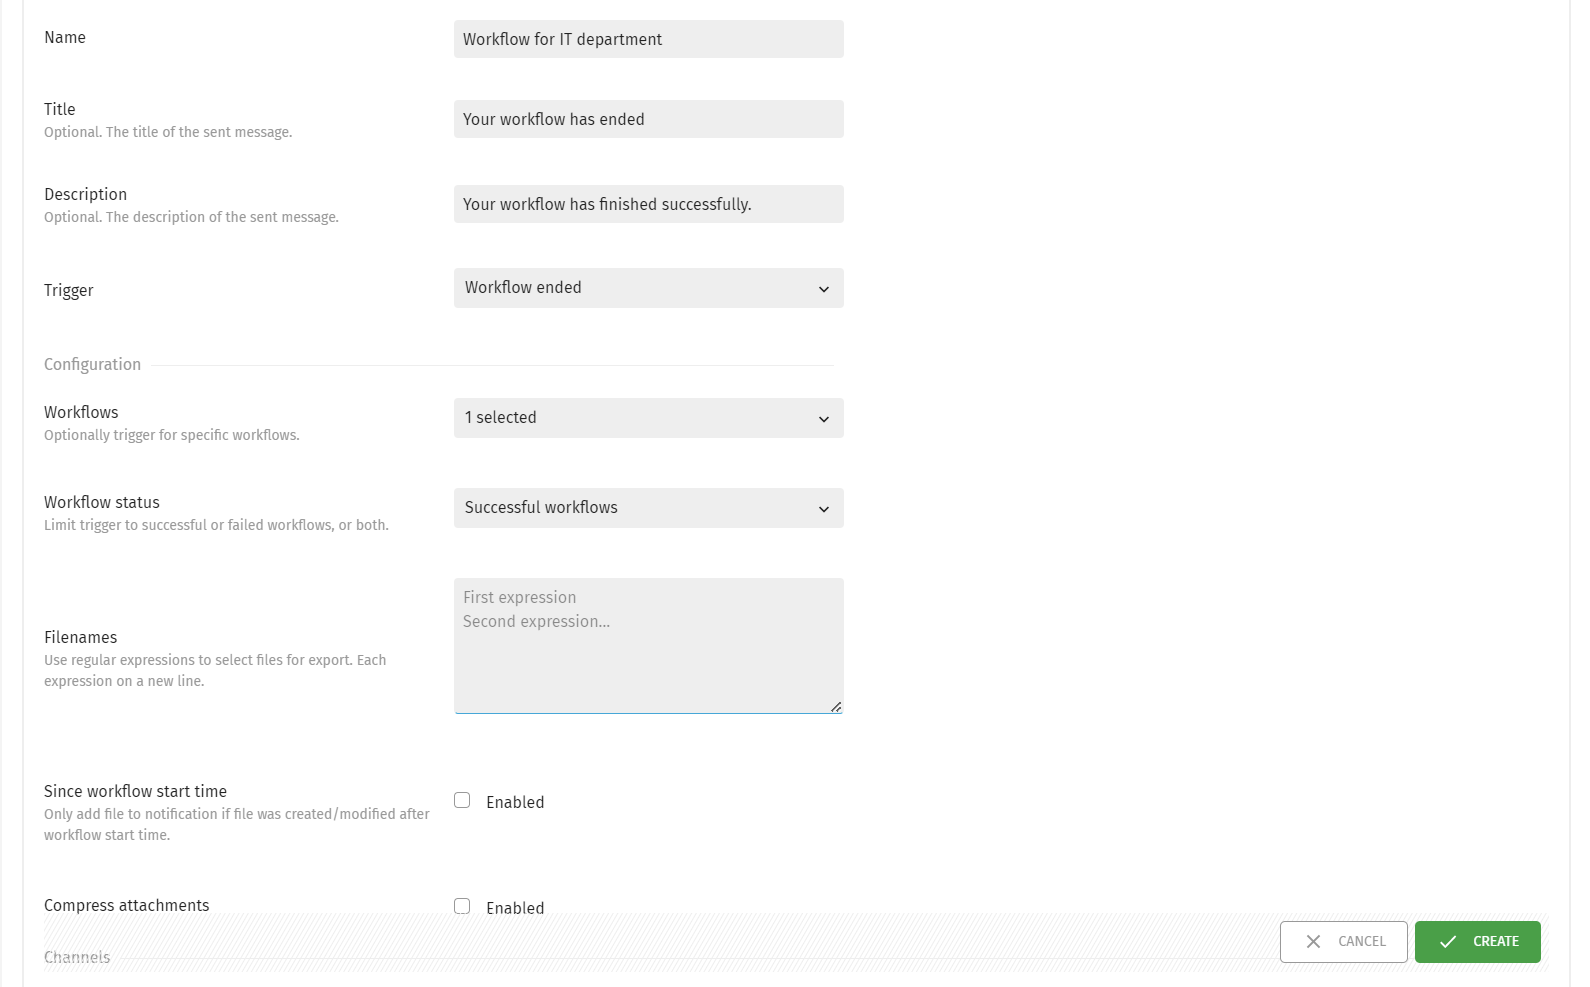
Fill in the details (Name, Title and Description) and make sure the Trigger is set to Workflow Ended:
-
Select one or more Workflows.
-
You can apply a trigger for a successfully finished workflow, a failed workflow, or both:

-
In the Filenames section, it is possible to use regular expressions to select which files to export.
-
You can opt for sending a file along with the notification only if the file was created/modified after the start time of that workflow. To achieve this, tick the Enabled box next to Since workflow start time.
-
It is possible to compress the files by ticking the Enabled box next to Compress Attachments.
-
Finally, click the Create button.