Auth0
First, we need to add Exivity to your Auth0 applications. Follow these steps:
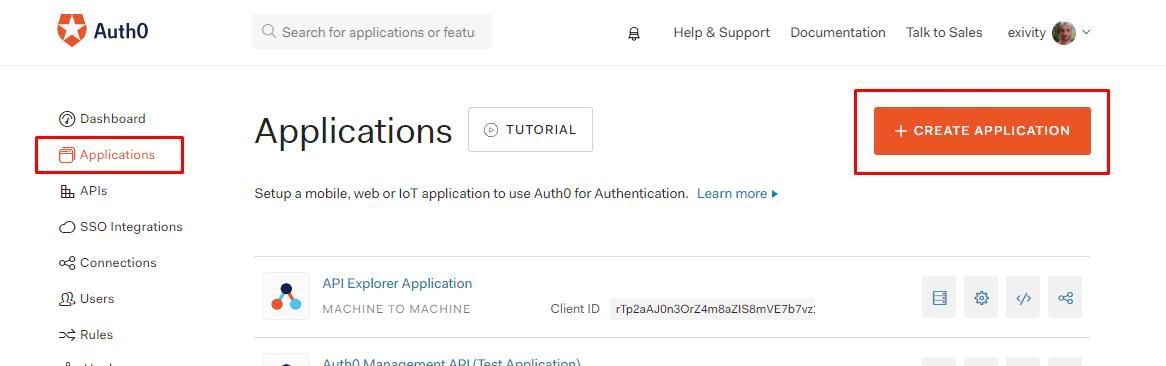
- On the Auth0 dashboard, click the Applications menu item, and then the Create application button:
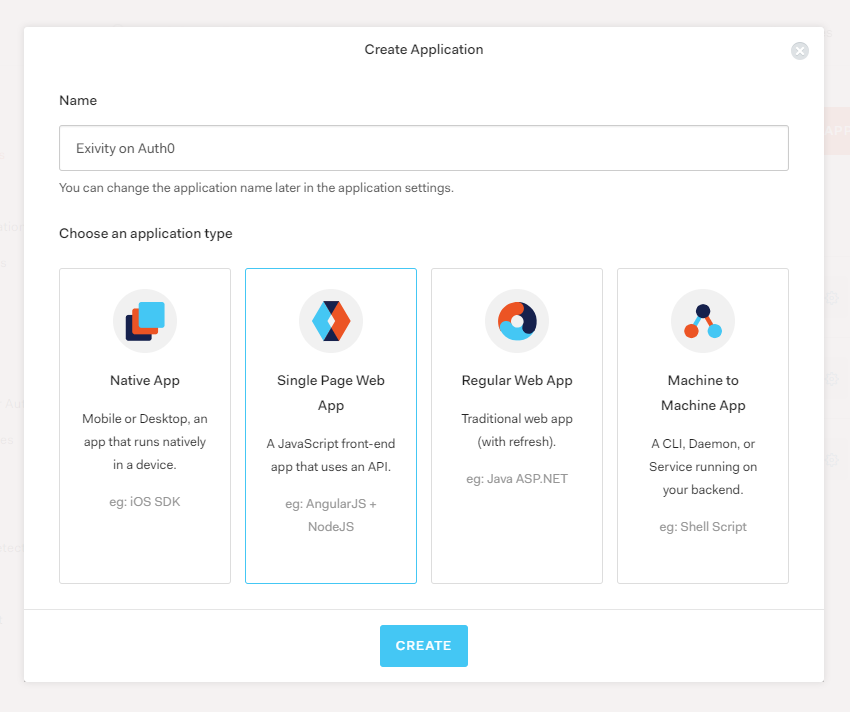
- Choose a descriptive name for your application, click the Single Page Web App button, and finally the Create button:
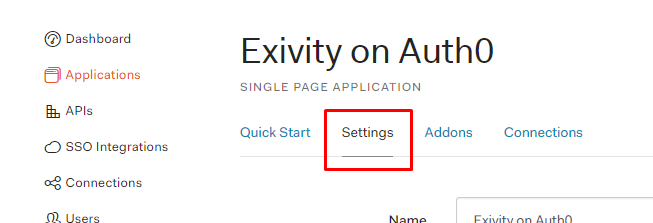
- On the application overview page, click the Settings tab:
- On this page, fill out the following details and click on the Save changes button:
| Field | Value |
|---|---|
| Allowed Callback URLs | Exivity Entity ID / Metadata URL endpoint (see endpoints) and Exivity Assertion Consumer Service endpoint (see endpoints) |
| Allowed Logout URLs | Exivity Single Logout Service endpoint (see endpoints) |
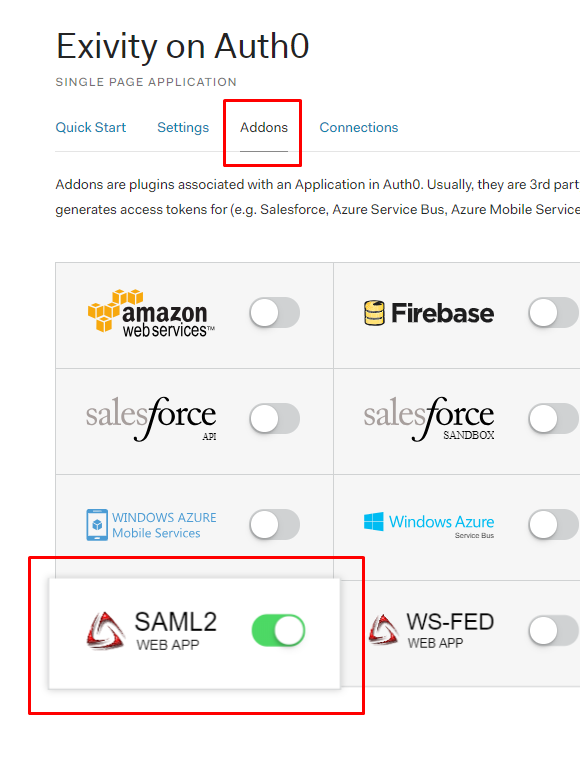
- Click on the SAML2 addon button. On the Settings tab, fill out the following details and click the Save button:
| Field | Value |
|---|---|
| Application callback URL | Exivity Entity ID / Metadata URL endpoint (see endpoints) |
| Settings | See below |
{
  "nameIdentifierProbes": [
    "http://schemas.xmlsoap.org/ws/2005/05/identity/claims/emailaddress",
    "http://schemas.xmlsoap.org/ws/2005/05/identity/claims/nameidentifier",
    "http://schemas.xmlsoap.org/ws/2005/05/identity/claims/name"
  ],
  "logout": {
    "callback": "[Exivity Single Logout Service endpoint]"
  },
  "binding": "urn:oasis:names:tc:SAML:2.0:bindings:HTTP-Redirect"
}
Replace the text[Exivity Single Logout Service endpoint] with the Single Logout Service endpoint of your Exivity instance (see endpoints)
- Click on the Usage tab.
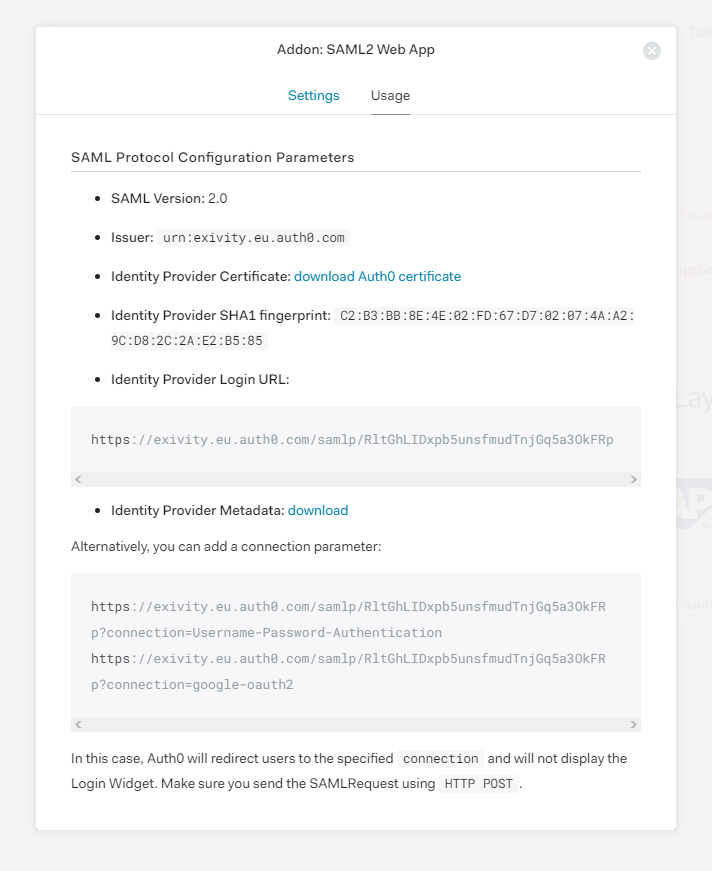
In a separate browser tab, open the Exivity SAML configuration (see configuration) and copy over the following settings:
| Exivity SAML setting | Use value |
|---|---|
| Entity ID | Issuer |
| SSO URL | Identity Provider Login URL |
| SLO URL | Identity Provider Login URL, suffix with /logout |
| X-509 certificate | Download the certificate by clicking the Download Auth0 certificate link. Open the the text and all line breaks so you end up with a single-line base64 encoded string. |
| Advanced settings | {"security": {"wantXMLValidation": false}} |
- As the last step, enable Single Sign-On in Exivity by navigating to Administration > Settings and then clicking on the System tab. Make sure the Single Sign-On option is set to Enabled, and click the Update button:

SSO is now configured and enabled, and you can now use Auth0 to login to your Exivity instance. The login screen will look something like this:

And by clicking on the Login button, you'll be taken to the Auth0 login screen. Exivity will receive the Auth0 e-mail address and create a new user in the configured user group (see configuration) if no existing user is found.